The Apartment Method for India
By Harshad | Founder, Indieedogs | Puppy Training & Behaviour Specialist
If I could choose the one thing that makes or breaks the first month of puppy ownership in India, it would be this: toilet training done right in the first week.
Get it right, and by Day 7 you’re seeing real improvement — fewer accidents, emerging signals, a puppy who is beginning to understand what to do and where. Get it wrong — through inconsistency, punishment, or the wrong setup for your specific home — and you’re still dealing with daily accidents at Month 3.
The title says 7 days — and that’s the foundation window, not the completion date. Most puppies reach 80–90% reliability between weeks 4 and 8, depending on age and consistency. But the foundation laid in Days 1–7 determines everything. And the method that works is schedule-based, location-specific, and built for how Indian apartments actually work — not how a suburban garden in the UK works.
1. Why Most Potty Training Advice Fails Indian Apartment Owners
The majority of potty training guides available online were written for homes with gardens. Even the ‘apartment training’ guides are written for cities where a 2-minute walk to a grass patch is realistic at any hour. India’s apartment reality is genuinely different — and those differences affect almost every piece of conventional advice.
| 🌍 What International Guides Assume | 🇮🇳 The Indian Apartment Reality |
| You have a garden or yard to take the puppy to immediately A 2-minute walk to a grass patch is manageable at 2am Your building compound allows dogs freely at any hour You can leave immediately every time the puppy shows signs Pee pads are a temporary crutch — outdoor training from Day 1 Neighbours will not complain about night-time toilet trips in the lift The floor you’re training on is consistent — grass behaves predictably One family member can be dedicated to toilet duty around the clock | Most Indian apartments are 3–8 floors up with a lift journey each way A night-time toilet trip takes 10–15 minutes minimum — starting with the lift Housing society rules may restrict dog access to common areas after certain hours During monsoon, taking an 8-week puppy outside every 45 minutes is genuinely difficult Pee pads or an indoor toilet spot are a practical necessity, not a shortcut The lift, the stairwell, the neighbour’s front door: all realistic obstacles Marble, granite, and tile floors require a specific approach vs grass Many Indian homes have domestic help, grandparents, and multiple adults — inconsistency is higher |
The Three Principles That Survive Translation to India
Despite the differences, three core principles work in any environment:
- Timing beats reaction: Take the puppy to the toilet spot before they need to go, not after they’ve already started. The schedule is more important than watching for signs — especially in the first two weeks.
- Location consistency: The puppy must toilet in the same specific spot every time. Scent familiarity is the primary driver of a puppy’s toilet choice. Make their smell in the right place, and they’ll return to it.
- Reward completion, not return: The treat appears the instant they finish going — at the toilet spot — not when they come back inside. Precision here is the difference between ‘good job going there’ and ‘good job coming back to me.’
Everything in this guide is built on these three principles — adapted for lifts, balconies, monsoon seasons, marble floors, and the specific household dynamics of Indian apartment life.
| 📌 The First 7 Days in One Sentence |
| Take the puppy to the right spot, at the right time, every time — and reward them precisely when they go. |
| That is the entire method. |
| Everything else in this guide is the detail of how to execute that sentence |
| inside the specific reality of an Indian apartment. |
2. The Schedule-Based Method — Timing and Consistency Beats Everything Else
| The Schedule Is the Method Not signs. Not instinct. Not watching and hoping. The schedule drives the training. |
The most common mistake in potty training is reactive training: watching the puppy for signs and rushing to the toilet spot when you spot them. Signs are useful reinforcement — but they are not reliable enough to build a training programme around, especially in the first two weeks.
The schedule-based method takes a different approach: you take the puppy to the toilet spot at predetermined moments, regardless of whether they show signs. The schedule creates the habit. The habit becomes the training.
| When to Go | How Soon | Why This Specific Moment |
| On waking | Immediately | The moment the puppy wakes from any sleep — day or night — take them directly to the toilet spot. No stops. No play. Toilet first. Every single time without exception. |
| After every meal | Within 10 minutes | Puppies have an active gastrocolic reflex — eating triggers bowel movement within 10–20 minutes. After every meal, toilet trip follows within 10 minutes. If you miss this window, an accident is almost certain. |
| After play | Within 5 minutes | Physical activity stimulates bladder and bowel. Every play session ends with a toilet trip. The transition from play to toilet is part of the routine. |
| After car rides / going out | Immediately on return | The excitement of arriving home triggers a toilet urge. Take the puppy to the toilet spot before any greeting, any play, any feeding. Always. |
| Every 45–60 minutes | Age 8–10 weeks | For very young puppies, a toilet trip every 45–60 minutes during waking hours prevents accidents. Set a phone timer. The timer, not your observation of signs, is the schedule anchor. |
| Every 60–90 minutes | Age 10–14 weeks | Bladder control improves. Extend to every 90 minutes during waking hours. Still scheduled — not reaction-based. |
| Every 2 hours | Age 14–18 weeks | Approaching 4 months, a 2-hour interval during the day is manageable. The puppy has more warning time before accidents now. |
| Before crate entry | Every time | The last thing before any crate session — including overnight — is a toilet trip. This single step more than anything else determines night-time accident frequency. |
| Before bed | Final trip of day | One final toilet trip immediately before the apartment door closes for the night. Even if they went 20 minutes ago — try again. |
The Bladder Capacity Reality — Your Schedule Must Match It
One of the most common reasons potty training fails is expecting too much, too soon. An 8-week puppy cannot hold their bladder for 2 hours — physically. The schedule must be adjusted to their developmental stage:
| Age | Daytime Hold | Night Trips Needed | What This Means for You |
| 8 weeks | 45–60 min | 2–3 times per night | Every waking moment is a potential toilet moment. The schedule drives everything. |
| 10 weeks | 1–1.5 hours | 1–2 times per night | First signs of improving control. Night trips reduce when routine is consistent. |
| 12 weeks | 1.5–2 hours | 1 time per night | Most puppies can achieve a 3–4 hour overnight stretch by this stage. |
| 14 weeks | 2–2.5 hours | 0–1 times per night | First glimpse of a full night for many puppies on a good schedule. |
| 16 weeks | 2.5–3 hours | 0 times most nights | Full overnight dryness becoming the norm for puppies with consistent training. |
| 5–6 months | 3–4 hours | 0 times — full nights | Adult bladder capacity approaching. Accidents should be rare exceptions, not regular occurrences. |
The Pre-Trip Signals — Reading Your Specific Puppy
Once the schedule is established (typically Day 3–5), you’ll start noticing your specific puppy’s pre-toilet signals. Learning these adds an extra layer of accident prevention:
- Sudden cessation of play — going still and sniffing the floor
- Walking in small circles or repeated back-and-forth in one area
- Heading toward a corner, behind furniture, or a specific floor area they’ve used before
- Tail position change — slightly raised or tucked, depending on the individual puppy
- Increased restlessness during a play session that should be winding down
When you see these: immediately pick up the puppy or guide them calmly to the toilet spot. No rush, no drama — just quick, purposeful movement. Urgency in your movement translates to urgency in the puppy.
| ⏱️ The Timer Method for Busy Indian Households |
| Set a repeating phone timer for 45 minutes during waking hours. |
| When it goes off: toilet trip. No exceptions. Not ‘in a minute.’ Now. |
| This is particularly important in Indian homes where the responsibility might be shared between |
| multiple family members, domestic staff, or rotating caregivers. |
| The timer removes the ambiguity: when it rings, someone takes the puppy. Who is on duty is the only variable. |
3. Setting Up Your Potty Spot — Balcony, Bathroom, or Pee Pad?
The location question is the most India-specific part of the entire programme. International guides say ‘go outside.’ Indian apartments say: which floor are you on, does the lift work at 2am, does your housing society allow dogs in the garden after 10pm, and is it currently June in Chennai?
Here is an honest, ranking-based guide to every realistic Indian apartment toilet spot:
| Potty Spot Option | Rating | Best For | India-Specific Guidance |
| Building compound / outdoor | ⭐⭐⭐⭐⭐ | High-rise with easy compound access, society allows dogs, elevator quick | The gold standard. Real grass or soil, outdoor air, matches the adult toilet behaviour you ultimately want. Use for every trip where physically feasible. All other options are supplementary to this one, not replacements for it. |
| Balcony with pee pad / grass mat | ⭐⭐⭐⭐ | Apartments above 5th floor, monsoon season, night trips, post-vaccination window | Excellent Indian option. Close proximity, no lift needed, accessible at 2am without waking neighbours. A tray of real grass on the balcony (available from nurseries and Amazon India) is superior to a pee pad — provides the correct surface texture and scent. Pee pad as a backup to the grass tray. |
| Bathroom floor with pee pad | ⭐⭐⭐ | No balcony access, extreme weather, very young puppy pre-vaccination, temporary setup | Works but requires the most careful transition later — bathroom tile is not a natural toilet surface and can create a tile-surface generalisation problem. Use a specific spot every single time. Treat as a temporary setup to transition away from as soon as balcony or outdoor access is feasible. |
| Designated indoor tile spot | ⭐⭐ | Absolutely no other option | Last resort. The problem: dogs trained on flat tile surfaces can generalise to any tile surface — including the living room floor and your kitchen. If using this: keep the spot extremely consistent, use a pee pad to mark it, and transition to outdoor/balcony at the earliest opportunity. |
| Living room on pee pad | ⭐ | Not recommended | Training the puppy to go where you also live creates generalisation problems that are very difficult to undo. If no other option exists: use a very specific corner, confine the puppy to that area during training, and transition aggressively as soon as alternative spots become available. |
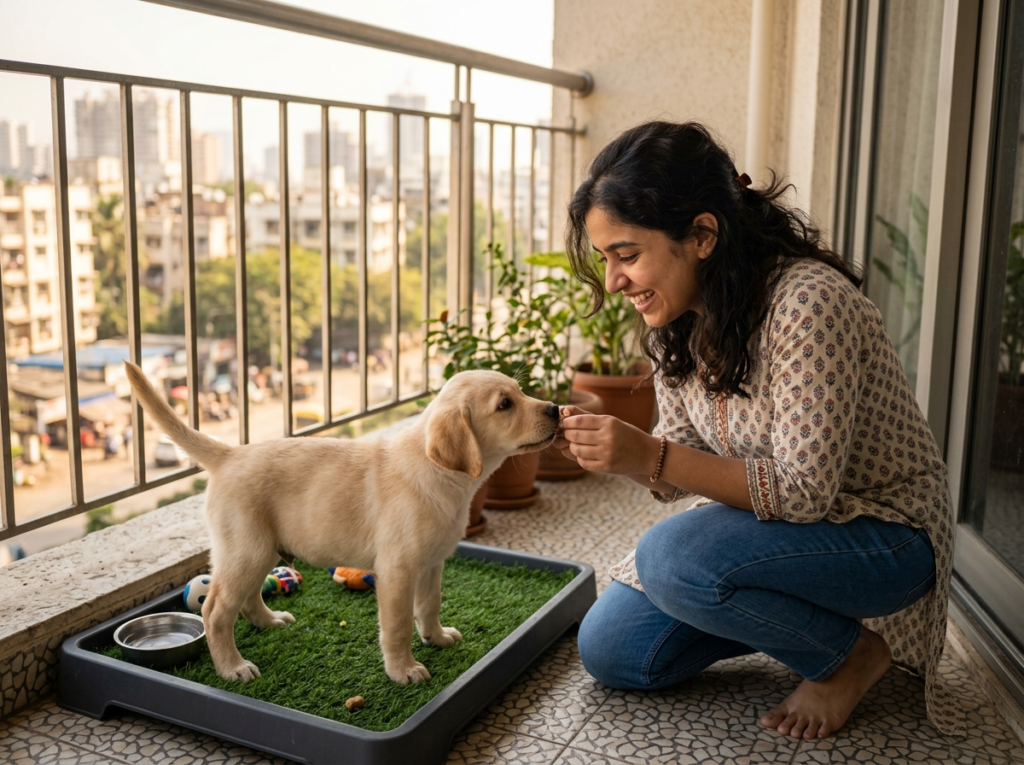
The Balcony Grass Tray — The Best Indian-Specific Solution
The single best toilet training setup for Indian apartments above the 3rd floor: a shallow tray (available from hardware stores — a boot tray or plastic planter base) filled with 3–4 inches of real soil and grass, placed on the balcony. This can be replenished cheaply from any plant nursery.
Why it outperforms a pee pad: real grass smells like a toilet spot should smell like. It provides the correct surface texture. Puppies trained on grass trays transition to outdoor grass significantly more naturally than puppies trained exclusively on pads. The scent association does the work.
Maintenance: rinse the tray daily. Replace the grass every 1–2 weeks. Place it in the same corner of the balcony every time. The consistency of location is as important as the surface itself.
The Pee Pad Setup — Doing It Right
If pee pads are your primary or supplementary indoor option, here’s how to set them up for maximum effectiveness:
- Use only one pad in one consistent spot — not multiple pads across the apartment
- Initially: a larger pad surface gives the puppy a bigger target to hit while they’re still learning
- Place a slightly used pad (with the puppy’s scent) in the new location when you first set it up — the smell guides them to it
- Never place the pad near the food and water bowls — dogs do not like to toilet near their eating area
- Change the pad after each use — unless you’re using the scent intentionally during the introduction phase
| 🌧️ The Monsoon Strategy |
| June–September in most of India: outdoor toilet training becomes genuinely difficult. |
| The practical solution: maintain a balcony grass tray or bathroom pad as the primary indoor toilet |
| for this window, while continuing outdoor trips on non-rain days. |
| Do not abandon the outdoor training entirely during monsoon — but build it around weather. |
| A dog that only toilets indoors through monsoon needs a careful transition back to outdoor preference in October. |
| The pee pad transition timeline in Section 6 addresses this. |
4. The Immediate Response to Accidents — The 3-Step Sequence
Accidents will happen. In the first week, they are guaranteed. What matters is not the accident — it is what you do in the three seconds after finding it, and what you do with the information it provides.
Most Indian pet parents respond to accidents with either punishment (scolding, showing the spot, punishing physically) or excessive apology (cleaning while saying ‘it’s okay, it’s okay’). Both of these teach the wrong lesson. Here is the correct three-step sequence:
| Step 1: Do Nothing — Interrupt Only If You Catch It Mid-Flow |
| If you find an accident after the fact: do nothing except clean it up. No scolding. No showing the puppy the spot. No rubbing their nose in it. The puppy has zero ability to connect a correction to something that happened more than 3–5 seconds ago. |
| If you catch the puppy in the middle of the accident: a calm, neutral interruption sound — ‘Ah!’ or a single hand clap — followed immediately by picking them up and taking them to the toilet spot. Not angry. Not dramatic. Functional. |
| The goal of interruption is not punishment. It is to move the toilet act to the correct location so you can reward it there. That reward is the lesson — not the interruption. |
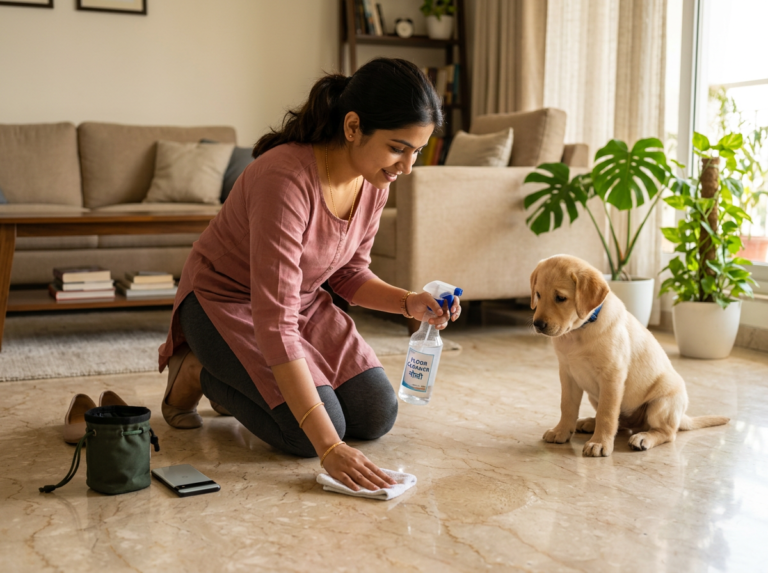
| Step 2: Clean With an Enzyme Cleaner — Not Surface Spray or Mopping |
| This step is where most Indian pet parents go wrong. Surface cleaners, Dettol, phenyl, and standard floor cleaners do not break down the odour molecules that attract dogs back to the same spot. The puppy’s nose can detect them even after the spot looks and smells clean to you. |
| In India: Enzymatic cleaners are available on Amazon India (brands like Pee Away, Nature’s Miracle India, and local veterinary suppliers). They break down urine and faecal proteins entirely — not just masking the smell. |
| If enzymatic cleaner is unavailable: a solution of white vinegar and water (1:1) applied to the spot and allowed to dry is a reasonable substitute. Never use ammonia-based cleaners — urine contains ammonia and the smell attracts the puppy back. |
| Apply the cleaner. Leave it for the directed contact time. Blot dry. Do not rinse with plain water (this dilutes the enzyme concentration). Repeat for any spot where more than one accident has happened. |
| Step 3: Learn From It — What Did the Accident Tell You? |
| Every accident is information. Instead of reacting emotionally, ask: what did this accident tell me about my schedule? |
| Accident in the morning near the bedroom door: the waking-to-toilet window was missed. Solution: take to toilet spot before any morning activity. |
| Accident after a long play session: the post-play toilet trip wasn’t taken. Solution: every play session ends with a toilet trip, no exceptions. |
| Accident in a specific corner of the living room: the puppy is scent-mapping this spot. Solution: clean thoroughly with enzyme cleaner and block access to that corner for 2 weeks. |
| Multiple accidents at the same time of day: that time slot is not covered by the schedule. Add a toilet trip 15 minutes before the typical accident time. |
| The pattern of accidents is your schedule gap map. Every accident shows you where the schedule needs a trip added. |
What to Never Do After an Accident
These responses actively slow down potty training and should be avoided completely:
- Rubbing the puppy’s nose in the spot — this causes fear and confusion, not learning
- Scolding loudly — the puppy associates your loud voice with going to the toilet, not with going in the wrong place. The result: they become reluctant to toilet in front of you at all — including outdoors
- Excessive ‘oops, it’s okay, don’t worry’ baby talk — this communicates that the accident is a positive event. Keep cleanups calm and neutral
- Punishing the puppy after the fact — if more than 5 seconds have passed, the association window is closed. The puppy is not connecting the punishment to the accident
| 🧹 The Enzyme Cleaner — Non-Negotiable for Indian Floors |
| On Indian marble, granite, and ceramic tile floors, urine soaks into the grout lines and micro-pores. |
| Standard phenyl, Dettol, and floor cleaners do not break down the urine proteins. |
| The dog’s nose can detect the residual smell even on a visually clean floor. |
| Enzymatic cleaners (Pee Away, Nature’s Miracle, veterinary-supply brands) are available on Amazon India. |
| If unavailable: white vinegar diluted 1:1 in water is the next best option. |
| Apply, leave for the contact time, blot dry. Repeat for any spot where accidents have recurred. |
5. Night-Time Potty — The Routine That Gives You Unbroken Sleep from Week 3
Night-time toilet training is the part that exhausts new pet parents the most — and it’s the part where one week of solid protocol investment pays the biggest return. The goal is clear: by Week 3, most puppies on this schedule are down to one night trip, and by Week 4–6, many are sleeping through.
Here is the complete night-time toilet routine:
| Time | Step | What to Do | Why It Matters |
| 10pm | Last meal | Feed no later than this. Remove the food bowl after the meal. The 8-week puppy needs 3–4 feeds per day — the last one at 10pm is the final anchor. | The later the last meal, the later the overnight bowel urge. 10pm timing supports the night schedule. |
| 10:30pm | Water restriction | Remove the water bowl 30 minutes before sleep. (Water freely available until then — hydration matters.) Small clip-on bowl in the crate is optional for overnight. | Limiting water intake in the final 30 minutes reduces overnight bladder pressure significantly without affecting daytime hydration. |
| 11pm | Final play | One final short play session (5 minutes) to deplete remaining energy. This is the wind-down cue for the puppy. | Physical depletion before sleep produces the longest first sleep stretch. |
| 11:10pm | Toilet trip | FULL toilet trip — wait until both urine and bowel are emptied if possible. Do not rush this. Give 5–8 minutes minimum. | A complete emptying before sleep is the single most effective action for reducing overnight wake-ups. Both urine AND bowel if the timing allows. |
| 11:15pm | Crate entry | Calm crate word. Treat. Door closed. Brief ‘good night’. No drama. Lights down. | Calm entry = faster settling. The energy of the crate entry is carried into the first hour. |
| 1–3am | Night trip | Most 8-week puppies will wake between 1–3am. When they cry: pick up silently, no eye contact, straight to toilet spot, wait, back in crate. No stimulation whatsoever. | The middle-of-night trip is purely functional. No greeting, no play, no reward beyond a quiet ‘good dog’ after going. This prevents the trip from becoming reinforcing in itself. |
| 4–6am | Second trip | Many young puppies need a second trip in this window. Same protocol: silent, functional, back to crate immediately after. | By 12–14 weeks, most puppies consolidate to one trip — often at 4am. By 16 weeks, many can hold through. Follow the puppy’s development, not a fixed target. |
| Morning | Wake trip | The instant the puppy stirs: take directly to toilet spot before anything else. Before greeting. Before food. Before play. | The morning wake trip is the most reliable toilet moment of the day. Never miss it. |
The Proactive Night Trip — Your Best Sleep Strategy
The reactive approach: waiting for the puppy to cry, then getting up for the toilet trip. Works, but your sleep is broken reactively.
The proactive approach: note the time the puppy typically wakes for their night trip (usually around 1–2am for 8-week-old puppies). Set your own alarm 15–20 minutes before that time. Take the puppy proactively. By the time they would have woken and cried, they’ve already been — and you’ve gone back to sleep before the usual wake-up time.
This is counterintuitive but produces better sleep. You control the timing rather than being woken at the worst moment. And over the following nights, the trip time gradually shifts later — because the schedule is moving the habit, not reinforcing the cry.
The Week-by-Week Night Improvement
- Week 1: 2–3 night trips. Unavoidable. Run the protocol consistently.
- Week 2: 1–2 trips. The schedule is establishing the pattern.
- Week 3: Most puppies need only 1 trip, often predictable within a 30-minute window.
- Week 4–6: Many puppies sleeping 10pm–5am with one trip around 3am.
- Week 8–10: Full nights possible for puppies on a consistent schedule with good pre-bed routine.
The puppies who achieve this fastest are not the easiest breeds or the most naturally compliant — they are the ones whose pre-bed routine was done without shortcuts, every night, from Night 1.
| 🌙 For the Lift-Dependent Night Trip |
| If your overnight toilet trip requires a lift journey (3rd floor and above): |
| Keep a pair of slip-on shoes and a thin lead by the bedroom door. |
| The total trip time is 8–12 minutes. Do not check your phone. |
| No greeting, no eye contact with the puppy beyond calm guidance. |
| Functional trip only — the less stimulating, the faster they go back to sleep. |
| By Week 3–4, many lift-dependent families have mastered this to under 8 minutes. |
6. When to Phase Out the Pee Pad — The Exact Transition Timeline
| The Pee Pad Exit Strategy When to remove it, how to move it, and why the India-appropriate end state isn’t always ‘no pad at all’. |
One of the most common questions I get from Indian pet parents: ‘When do I get rid of the pee pad?’ And the honest answer is: it depends on your living situation — and for many Indian apartments, the balcony pad is not just a temporary measure.
The international answer — ‘remove the pad as soon as outdoor training is established’ — works if you have a garden or immediate outdoor access. For someone on the 8th floor of a Mumbai high-rise with a monsoon outside and a 2am puppy, the balcony pad is a genuinely practical permanent solution for nighttime use.
Here is the transition timeline — adapted for the Indian apartment reality:
| Phase | Setup | What to Do | Why This Step |
| Wk 1–2 | Pee pad only | All indoor toileting on pee pads. Pee pad in bathroom or balcony. Every successful use rewarded generously. Outdoor trips attempted daily but not always successful. | Establishing the indoor toilet concept. The pad is the primary toilet spot during the vaccination window and early training period. |
| Wk 3–4 | Pad + outdoor | Pee pad remains in place. Begin taking the puppy outside after every meal and wake. When they go outside: jackpot reward — much bigger than the pad reward. The outdoor trip is becoming the preferred option. | Creating a preference hierarchy: outdoor > pad. The disparity in reward makes outdoor toileting more desirable without removing the safety net. |
| Wk 5–6 | Reduce pad size | Cut the pee pad in half. Place the half-pad in the same spot. The puppy still uses it. The surface smell is consistent. Begin moving the half-pad 30cm toward the door (or balcony/bathroom) each week. | Gradual spatial transition. The pee pad is moving toward the preferred outdoor exit route — either the front door or the balcony door. This physically guides the toilet behaviour toward the correct location. |
| Wk 7–8 | Pad near exit | The half-pad is now directly beside the balcony door or front door exit. Outdoor trips are happening after every meal and wake. The pad is catching only overflow accidents from missed trips. | The pad has moved from the centre of the apartment to the edge of the outdoor exit route. The puppy is increasingly going outside. |
| Wk 9–10 | Pad to balcony only | Move the pad to the balcony. The indoor living space is now pad-free. The puppy uses the balcony pad for any indoor need, and the outdoor spot for all walked trips. This is the Indian-apartment-specific ‘solved’ state for vaccinated puppies not yet fully outdoor-trained. | For many Indian apartment dogs, the balcony pad remains the practical solution indefinitely — especially for night trips, bad weather, and times when outdoor access isn’t feasible. |
| Wk 11–12 | Reduce pad frequency | Begin leaving the balcony pad off for weather-appropriate windows. Offer outdoor trip first. Pad available only as a backup. Reward outdoor trips significantly more than pad use. | Building toward outdoor-only preference. The pad is now a true backup — not a default. |
| Week 12+ | Remove or maintain | For fully outdoor-trained dogs with reliable outdoor access: remove the pad entirely. For Indian apartments where outdoor access isn’t always feasible: maintain the balcony pad permanently as a backup. This is not a failure — it is an India-appropriate solution. | The decision to maintain or remove the balcony pad depends on your lifestyle and access reality — not on a training principle. A dog that uses the balcony pad at night and goes outside during the day is a perfectly well toilet-trained Indian apartment dog. |
The Spatial Migration Method — Moving the Pad Without Losing the Training
The most common mistake in pad removal: taking the pad away suddenly. The puppy is trained to go on that scent, in that spot. Remove the smell without a transition and you guarantee accidents on the floor where the pad was.
The spatial migration method moves the pad gradually — 15–30 cm per week — toward the door or balcony exit. The puppy follows the scent. By the time the pad reaches its final position (beside the balcony door or near the outdoor exit), the puppy’s toilet habit has physically migrated with it.
- Weeks 1–2: Pad in its initial spot (bathroom/balcony corner). Establish the habit here.
- Week 3: Move the pad 20cm toward the balcony door.
- Week 4: Move another 20cm. Replace with outdoor trips at every opportunity.
- Week 5: Pad is now at the balcony threshold. Outdoor trips are the primary toilet.
- Week 6: Pad is on the balcony only. Indoor living space is pad-free.
- Week 7+: Assess: if balcony pad is being used only for overflow accidents and night trips, this may be the correct permanent setup for your lifestyle.
The India Endpoint: What ‘Fully Toilet Trained’ Looks Like Here
A fully toilet-trained Indian apartment dog looks different from a garden-home dog. And that is completely fine.
- Goes outside immediately after waking, after every meal, and after every play session — without being asked, by going to the door
- Has a balcony grass tray or pad as a night-time backup — uses it reliably and only when needed
- Has not had an indoor accident (beyond the overnight pad) in more than 2 weeks
- Signals to go out by waiting near the front door, barking at the door, or a trained cue signal
This is a fully toilet-trained Indian apartment dog. It is not a failure that the balcony option exists — it is a practical, dog-appropriate solution that respects the reality of high-rise urban living.
The 7-Day Overview — What Your First Week Actually Looks Like
| Day | Focus | What to Do | Daily Goal |
| Day 1 | Setup & first trips | Set up toilet spot. Introduce puppy to it immediately on arrival. Begin schedule: on wake, after every meal, every 45 mins. First night: expect 2 trips. No punishment for accidents. | Establish the location. Run the first full day of the schedule. Expect 3–5 accidents — this is normal. |
| Day 2 | Schedule consistency | Continue 45-minute schedule without gaps. Add the cue word (‘outside’, ‘go potty’, ‘toilet’) every time the puppy goes in the correct spot — said calmly while they’re mid-process. | The cue word begins being associated with the act. 2–4 accidents expected. Watch for signs. |
| Day 3 | Reading the signs | Begin watching for pre-toilet signals: sniffing the floor, circling, going quiet mid-play, heading toward a corner. Pre-empt these with a trip before the accident happens. | Your ability to read signs reduces accidents. Most parents see first signs emerging on Day 3 or 4. |
| Day 4 | Reward timing | Make sure you’re rewarding the moment of completion — not after they’ve walked back inside. The treat appears the instant they finish going, while still at the toilet spot. | Reward precision matters. The association is between the act at the correct spot and the treat. |
| Day 5 | Night schedule refining | Note at what times the puppy is waking for night trips. Adjust: if they wake at 1am and 4am, consider a proactive trip at 12:45am to beat the first wake. Pre-empting is more restful than reacting. | Night trips becoming somewhat predictable. Proactive trips are smoother than reactive ones. |
| Day 6 | Extending success | Count the accidents across Days 4–6. If fewer than 2 per day: you are on track. If still 4+: add an extra trip 15 minutes before the time slot when accidents most commonly happen. | Positive trend should be visible. Most puppies are at 1–3 accidents per day by Day 6. |
| Day 7 | Review & next week | Count total accidents for the week. Identify the pattern: which time slots, which spots. Plan next week’s schedule adjustments. Most puppies: 1–2 accidents on Day 7 vs 5+ on Day 1. | 7-day review tells you whether to tighten the schedule or begin extending the interval to 60–90 minutes. |